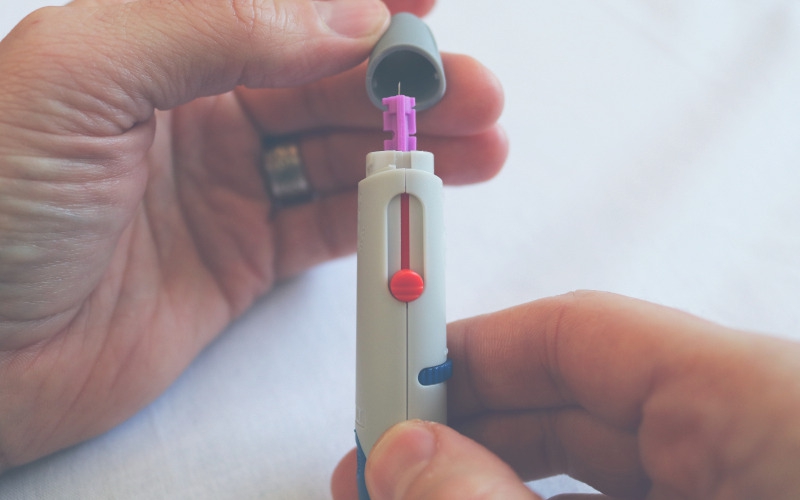
Let’s dive into how to use the STAT TRIO Lancing Device. Available on our website, and included with new diabetes testing set-ups this device is simple and effective in providing a blood sample for your traditional glucometer testing. We have a how-to video for more visual learners, as well as a written step-by-step guide with pictures.
Blood sampling from a finger:
Wash the test site with soap and warm water then dry completely. Then prep the test site with a 70% Isopropyl Alcohol prep pad. Before lancing, hang your arm down and gently rub the hand from the wrist to the base of the finger. This will help to get better blood flow and allow a good blood drop to form. Select a site on the outer edge of the finger for the best blood drop and the least bother. Avoid squeezing your finger after lancing.
WARNING:
- Single Patient Use Only.
- Do NOT share your lancing device with anyone, not even family members.
- Sharing your lancing device may cause the spread of infections or diseases to YOU and other persons.
- Not to be used for assisted blood draws by healthcare providers or at healthcare provision sites.
- Use a NEW sterile lancet each time you test.
- Clean your device after each use.
- Do NOT use if the device and/or lancet appear damaged.
- Do NOT use lancets that do not fit properly in the lancet holder.
- Do NOT use a lancet, if after insertion into the device the needle is protruding through the end cap.
- Failure to use the device properly may result in inaccurate reading or error codes on the meter.
Any setting where finger stick procedures are performed, including assisted living or residential care facilities, hospitals skilled nursing facilities, clinics, health fairs, shelters, detention facilities, senior centers, schools, camps, etc.

Instructions
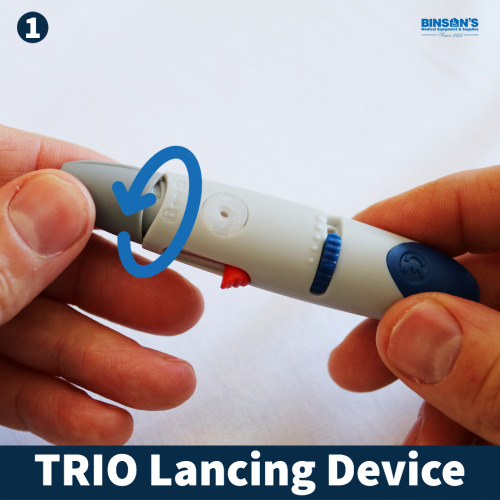
1. Remove the end cap (A) by twisting the cap counter-clockwise while holding the body of the STAT Trio device face-forward (E). Use only lancets that fit properly in the lancet holder.
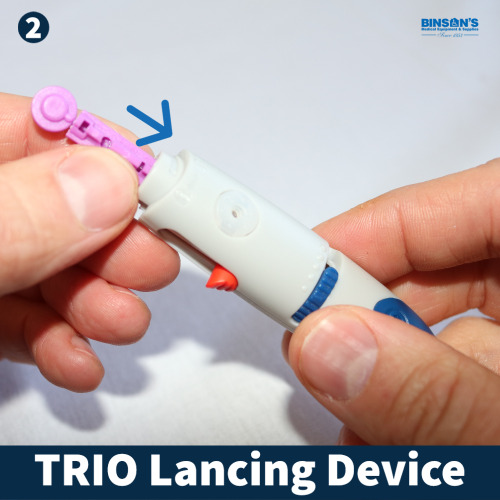
2. Insert a lancet body/cap (B/C) firmly into the lancet holder (D) until it comes to a stop (lancets sold separately).
3. Remove the protective lancet cover (C) by holding the STAT Trio device body (E) and the lancet (B) firmly with one hand. Twist/pull off the lancet cover (C) in a straight direction with the other hand to avoid bending the lancet tip. Note: Do NOT touch the lancet tip to retain sterility. WARNING: Do not touch the lancet tip. The sterility of the lancet is maintained until the cap is removed.

4. Replace the end cap (A) by twisting it clockwise onto the STAT Trio device body (E). Ensure end cap (A) is securely locked in place, otherwise, the device may not function as intended.

5. Select the skin penetration depth by sliding the depth selector (F) to the desired depth (G). The STAT Trio offers 5 levels of depth settings indicated by 5 dots with the smallest dot (lowest setting on the left progressing to the largest dot highest setting on the right): the first dot for soft skin; the second or third dot for average skin, and the fourth or fifth dot for thick or calloused skin.

6. Pull back on the STAT Trio arming mechanism (H) located at the back of the device until it comes to a stop. The arming mechanism will return to its original position upon release. If not, the device may not function as intended. The armed indicator located in the center of the release button (I) will appear red when the STAT Trio is ready-to-use for blood sampling.

7. Place the STAT Trio firmly against the finger and press the release button (I) to obtain a blood sample. The lancet will return to a retracted position after use.

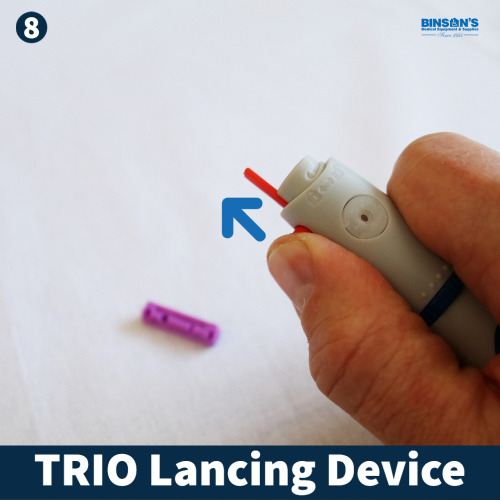
8. After finishing your blood test, remove the STAT Trio end cap (A) and use the lancet ejector (J) to eject the lancet (B) safely into an appropriate sharps container.
We hope you found the information useful. If you are a current Binson’s customer and you need to order more supplies we recommend you check out our easy online ordering. If you are interested in becoming a Binson’s customer we would love to have you. To get started we suggest filling out our online enrollment form. Thanks for reading!




0 comments